08. Localization: Parameter Tuning - 1
Parameter Tuning
Exploring, adding, and tuning parameters for the amcl and move_base packages are some of the main goals of this project. In this section, we will cover some parameters that will help you get started, but you will get a chance to experiment with the rest and observe what effect they bring about.
Expected Results
Before we jump into the list, let’s take a step back and focus on what you are aiming to achieve. The move_base package will help navigate your robot to the goal position by creating or calculating a path from the initial position to the goal, and the amcl package will localize the robot. But how do we know how certain the algorithm is of the robot’s pose?
That’s what the PoseArray, in RViz, helps us with. The PoseArray depicts a certain number of particles, represented as arrows, around the robot.
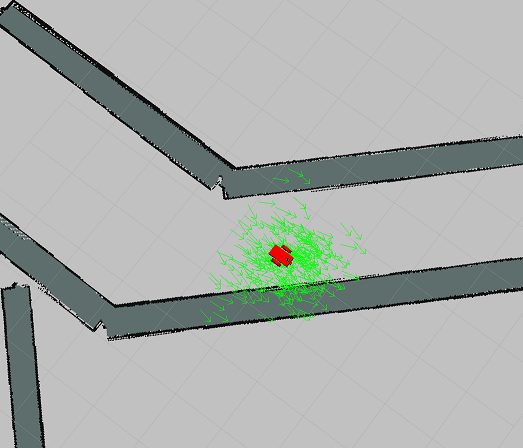
The position and the direction the arrows point in, represent an uncertainty in the robot’s pose. This is a very convenient, albeit a slightly subjective, method to understand how well your algorithm and your tuned parameters are performing. Based on the parameters and what values you select for them, as the robot moves forward in the map, the number of arrows should ideally reduce in number. The algorithm rules out some poses. This is especially the case for when the robot is closer to walls - it is more certain of its pose because of the laser data, as opposed to when it is roaming in an open area for too long.
Robot with its PoseArray along the corridor.
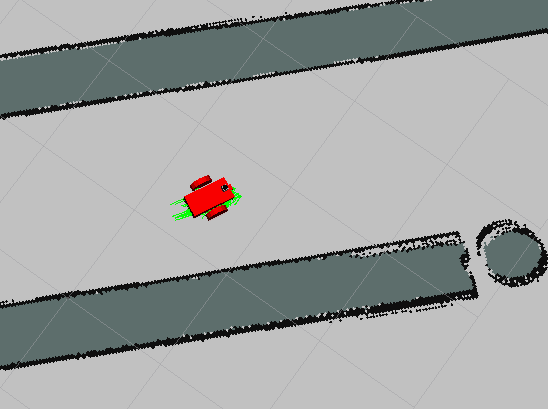
You should expect similar results around the goal position. Depending upon how the robot has to orient itself, it might have slightly poorer results, and that's acceptable. But overall, the PoseArray should be narrow, centered around the robot, and pointing in the right direction.
Robot's PoseArray close to the goal position.
Your aim for this project is to make sure that your localization results are as certain of the robot’s pose as the above images depict. If the spread of the arrows, or particles, is too large then the robot is highly uncertain of its position, and the same goes for which direction the majority of the arrows are pointing in.
Robot Motion
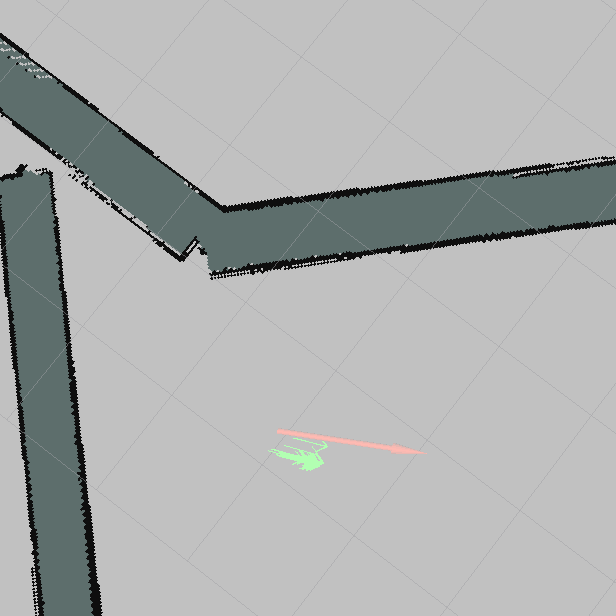
In the previous section, you were asked to use the “2D Nav Goal” button in RViz to make the robot navigate to the goal position. However, that might not have worked as intended resulting in some warnings or errors, as shown below, and your robot might not be responding.
Let's look at some of these warnings and how to tackle them.
Transform Timeout
There are three different types of maps that are being created/generated in RViz when you run amcl.launch.
- The world map - The visualization of the world or environment from Gazebo.
- The global costmap - Created by the navigation stack/package. A costmap, which you will learn more about in future lessons, essentially divides the map into a grid where a cell could represent free space or an obstacle. The global costmap is used to generate a long-term path for the robot, such as the path to the goal position from the robot's starting position.
- The local costmap - The local costmap is used to generate a short-term path for the robot. For example, a path that attempts to align itself and the robot with the global path.
The tf package, as you know, helps keep track of multiple coordinate frames, such as the transforms from these maps, along with any transforms corresponding to the robot and its sensors. Both the amcl and move_base packages or nodes require that this information be up-to-date and that it has as little a delay as possible between these transforms.
The warning message in the above image is indicative of the maximum allowed delay to either be not defined or to be too low for the system to compensate for. This maximum amount of delay or latency allowed between transforms is defined by the transform_tolerance parameter.
Your first task is to add and tune this parameter for both the amcl node in amcl.launch file and for the move_base node in the costmap_common_params.yaml file. Tuning the value for this parameter is usually dependent on your system.
Once you have the transform_tolerance variable defined and tuned properly, you should be able to visualize all the three maps in RViz without any issues, and the warning should disappear. Only to be replaced by a new warning.
Map Update Loop

The warning seems to indicate that your map or costmaps are not getting updated fast enough. The update loop is taking longer than the desired frequency rate of 50 Hz or 0.02 seconds.
How can you fix this? One way might be to get more processing power! But that's not always feasible. Since it's an issue related to the map or the costmaps, why don't you check out the configuration files (yaml) that you created for the move_base node and identify which parameters you can add or update to solve this problem.
Here is a detailed list of parameters corresponding to costmaps in ROS - http://wiki.ros.org/costmap_2d that can help you identify the necessary parameters.
SOLUTION:
- update_frequeny
- publish_frequency
As you might notice, a lot of the warnings you seem to be getting are because of system limitations. A larger and more detailed map will result in a large global costmap, and would use more resources. Apart from tuning the frequency with which your map is getting updated and published, you can also modify the dimension and resolution of your global and local costmaps.
Modifying these parameters can help free up some resources, however, decreasing the resolution of your map by too much can lead to loss of valuable information too. For example, in case of small passages, low resolution might cause the obstacle regions to overlap in the local costmap, and the robot might not be able to find a path through the passage.
**Note: ** Modifying the above two parameters might help with the overall response, but it could potentially also help with ensuring that your robot is able to follow the defined local path. This might come in handy to experiment with later as well.
Try running your project again, and define a goal position using the "2D Nav Goal" button in RViz, a short distance from your robot.
Your robot should start moving! That's brilliant!
But, it doesn't seem to be following the path and might be hitting the walls.
In the next section, we will go through some more parameters that can help you tackle this problem and then move on to some of the parameters that could help improve your localization results as well.